
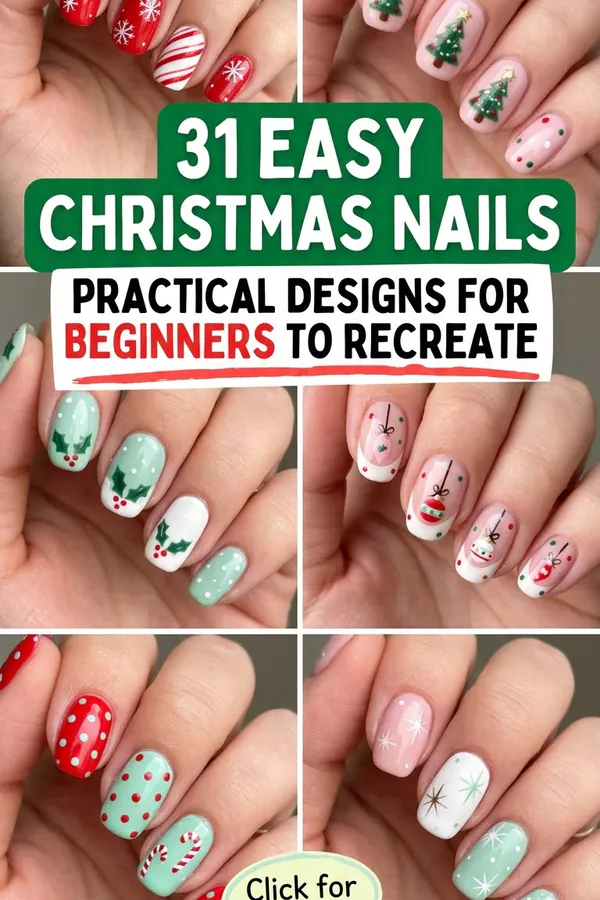
Beginner manicures work best when each design uses one tool and one or two colors. 31 Easy Christmas Nails Practical Designs for Beginners to Recreate sorts 31 ideas by technique, so you can match a look to the supplies you already own.
Each idea explains what makes the design work and how to recreate it, from dotting tools and striping tape to simple decals. Where a step often trips up beginners, you will find a small fix.
Start with one look, practice on a single nail, and build from there. These easy Christmas nails rely on repeatable shapes such as dots, tips, stars, and short lines.
Table of Contents
1. Pearlescent Beige, No Art Needed
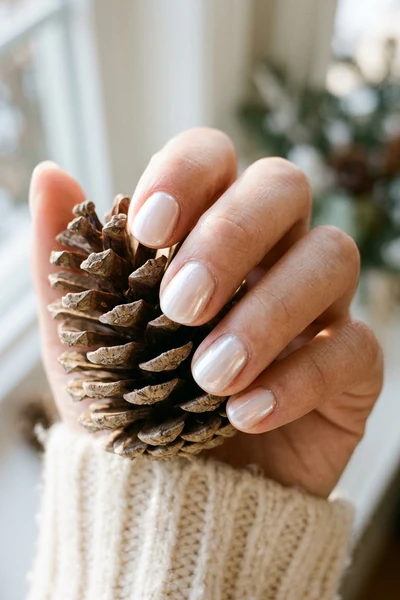
Pearlescent beige gives a soft sheen with no art at all. The shimmer in the polish catches light, so the nails look finished even in a plain coat.
This is a good first pick among easy Christmas nails, because two thin coats and a top coat are all it needs.
A pinecone in your hands fits the neutral palette. For even more minimal options, see 30 Christmas Nails Simple Cozy Designs for an Easy Seasonal Update.
2. Deep Red With Gold Star Decals

Deep red with gold stars is a classic pairing. Star decals are the easiest route: lift one with tweezers, place it, and press it down with a clean fingertip.
Decals keep easy Christmas nails neat even if your freehand is shaky, and two or three per hand are plenty.
Seal over the stars with top coat, and cap the free edge so the decal does not lift at the tip.
3. Easy Christmas Nails With Gold Flakes

Gold flakes on caramel look warm and rich. Dab a little tacky top coat on the nail, then press the flakes on with a small brush or the tip of a toothpick.
Use only a few flakes per nail, since they spread when pressed. Tap away the extras before sealing with another layer of top coat.
A white ribbon makes a neutral backdrop for the gold if you are photographing the set.
4. Gold Tips Using Guide Stickers

Gold tips on soft beige are a gentler alternative to a white French manicure. Tip guide stickers help you get an even curve.
Easy Christmas nails like this rely on the guides, not on a steady hand, so press the sticker edge down firmly before painting.
Remove the guide while the gold is still slightly wet to avoid peeling. For polished variations, see 33 Classy Christmas Nails Luxurious Designs for a Sophisticated Holiday.
5. Pearl Dots, Two Ways

Small pearl dots on soft beige add texture. Flat-back pearls can be attached with nail glue, while a dotting tool and white polish gives a paint-only version.
Both methods suit easy Christmas nails, so choose based on whether you want raised or flat dots.
Space the dots in a gentle curve near the cuticle. A cream sweater echoes the pale palette.
6. Snowflakes From Three Lines

A snowflake can be drawn from three crossing lines. Add a short V at the end of each line and a dot in the middle.
That method keeps easy Christmas nails like these within reach for beginners, since no outline is needed.
Use white or pale silver on beige for a soft contrast. For other delicate looks, see 32 Subtle Christmas Nails Soft Designs With a Delicate Festive Touch.
7. Diagonal Pearl Dots on Beige

This pearl design differs from the previous one by using a diagonal line of dots instead of a cluster. The slant draws the eye across the nail.
Diagonal placement is a handy trick for easy Christmas nails, since it looks planned even when the dots are slightly uneven.
Green velvet is a good backdrop for pale beige, so consider a green sweater or scarf for the full effect.
8. Easy Christmas Nails With a Snowflake Accent

One snowflake on a single nail keeps the manicure simple. Use a toothpick or a thin liner brush dipped in white polish.
Red details in your styling, such as an ornament, add color without changing the polish. Keep the other nails plain beige.
If a line smudges, wait a minute for it to set, then touch up with a tiny dab of top coat.
9. Tiny Gold Stars on Beige
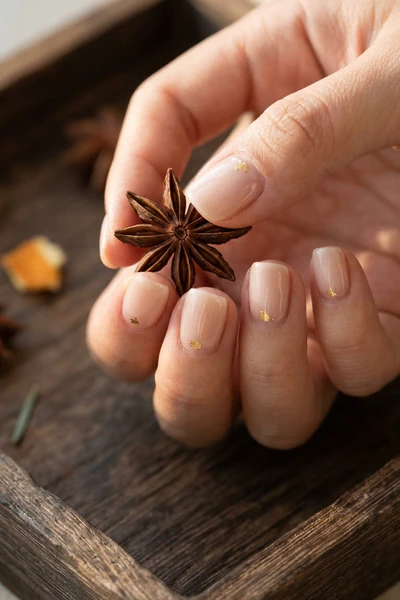
Gold stars on beige work well when they are tiny. Dot three points of a star with gold polish and connect them with a thin line.
Spices like star anise suggest a warm palette, which suits easy Christmas nails in gold and beige.
Stars can also be drawn as simple crosses if a full shape feels fiddly. For more warm seasonal colors, see 33 Thanksgiving Fall Nails Cozy Looks Inspired by the Best of Autumn.
10. Burgundy With Gold Stars

Burgundy is darker than red, which makes gold stars stand out sharply. A brass tray echoes the same metal tone.
For easy Christmas nails with more depth, apply two coats of burgundy and let them dry fully before adding stars.
Stickers or a toothpick dipped in gold polish both work. For more at-home ideas, see this Yahoo roundup of Christmas nail designs you can do at home.
11. One Gold Star on Dark Red

A single gold star on dark red is the lightest version of the star theme. Put it on the ring finger or thumb.
That one-nail approach is ideal for easy Christmas nails you want to wear to work.
Knit fabric gives a cozy backdrop. Keep the other nails glossy and plain so the star stays the focus.
12. Bold Red Tips on Beige

Red tips on soft beige are a classic Christmas French manicure. Use a thicker tip band for a bold, graphic look.
Tip guides make easy Christmas nails like these simple to repeat on every finger.
A steaming mug suits the cozy tone. Short nails take this band well too, and 35 Short Christmas Nails Adorable Designs for Tiny Festive Details has more ideas for them.
13. Alternating Green and Red Tips
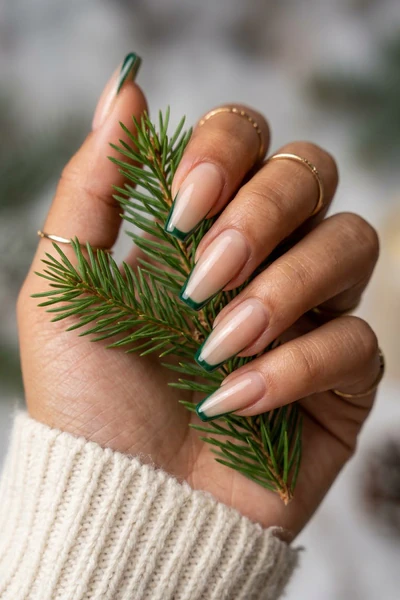
Green tips on beige pair with the red version, and you can alternate the two colors across your hand for a mixed set.
Alternating colors makes easy Christmas nails feel more varied without adding any new technique.
Paint all tips of one color first and let them dry, then do the second color so the edges stay clean.
14. Easy Christmas Nails With Red Berry Dots
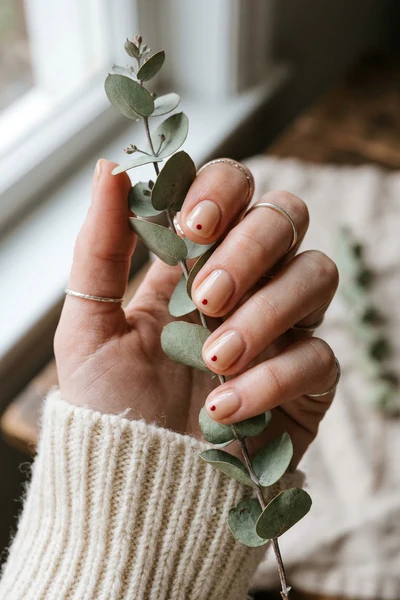
Red dots on beige read as berries. Use a dotting tool and make clusters of three, arranged in a small triangle.
Eucalyptus in your styling has a muted gray-green tone that works with the red. You can paint a thin stem to connect the dots.
Wipe the tool with remover between dots so each one stays round.
15. Dark Green With Gold Stars

Dark green with gold stars shows contrast clearly. Because green is dense, two coats usually give even color.
Among easy Christmas nails, this is a good test of patience: wait for the green to dry before placing the stars.
A clear ornament gives a frosty backdrop. For more seasonal inspiration, see 30 Christmas Nails 2026 Viral Designs for a Fresh Festive Mood.
16. Gold Vertical Lines

Gold vertical lines on beige look like thin ribbon. Run striping tape from cuticle to tip, paint over the edge, and peel.
Vertical lines also make nails look longer, a useful detail for easy Christmas nails on short natural lengths.
One or two lines per nail are enough. Hold a teacup or any prop while taking photos for a calm winter feel.
17. Sponged Silver Glitter Tips

Silver glitter tips work well on beige because the glitter shows against the pale base. Use a makeup sponge to dab glitter polish along the edge.
Sponging is a beginner-friendly step for easy Christmas nails, and it blends the edge so it looks soft.
Burgundy velvet in the styling brings out the silver. For similar deep shades, see 35 November Nails 2026 Trendy Looks to Watch as the Season Changes.
18. Red Base With a Gold Bow

A deep red base with a gold bow looks like a wrapped gift. Paint two loops and a small knot, or use a bow decal.
Decals are the quickest route for easy Christmas nails with a bow, and a clear top coat holds them flat.
Center the bow near the base of the nail so it stays visible, and avoid placing one on every finger.
19. Lavender and White Snowflakes
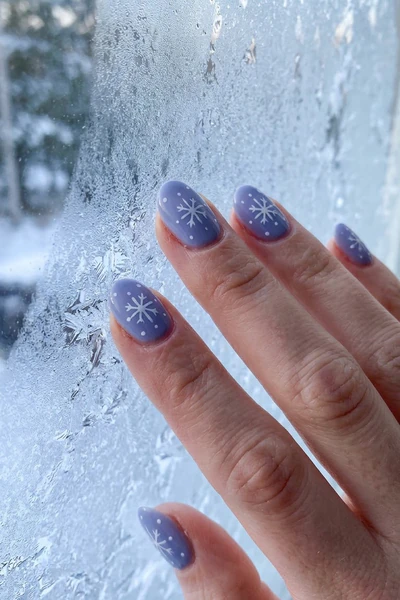
Lavender is an unexpected winter shade. It pairs well with white snowflakes and feels soft rather than traditional.
If you want easy Christmas nails that stay away from red and green, pastel purple is a good place to start.
White polish is more opaque than silver on lavender, so snowflakes show in one pass. A frosty window shows off the cool tones well.
20. White Nails With Glitter Tips

Soft white nails with glitter tips need two or three thin coats for even color. Wait for each coat to dry before the next.
Easy Christmas nails in white show chips less when the free edge is capped with polish.
Silver glitter on the tip matches a silver bell nearby. For more stress-free sets, see 31 Christmas Nails Easy Effortless Designs for a Stress-Free Festive Look.
21. Snowman on Deep Red
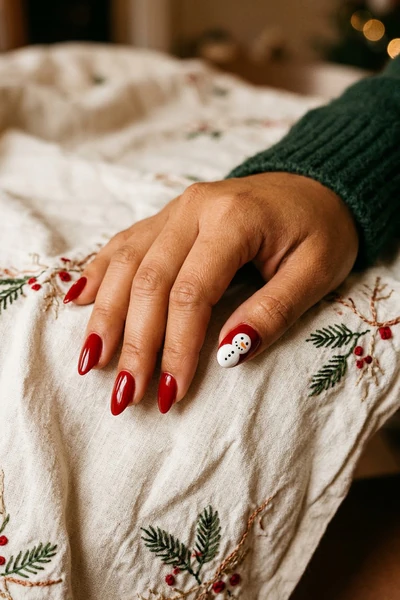
A snowman needs three white circles, two black dots for eyes, and a small orange triangle for the nose. Use a dotting tool in graded sizes.
Snowmen are a playful pick among easy Christmas nails, and they work well on red because the white contrasts strongly.
Put the snowman on one accent nail. For similar approachable ideas, see InStyle’s guide to simple Christmas nail designs to DIY.
22. Easy Christmas Nails With Pine Branches
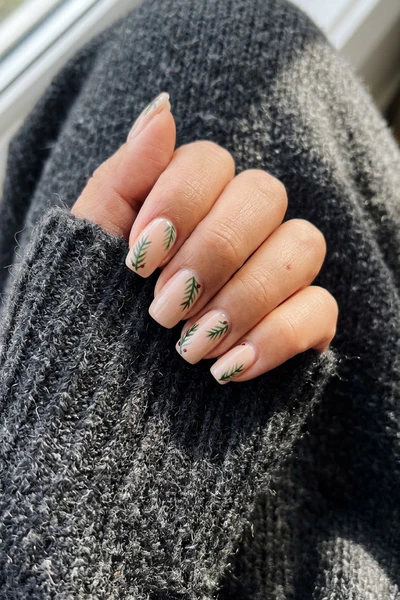
A pine branch is one curved line with short angled strokes on each side. Use green polish and a thin brush.
Make the strokes slightly shorter near the tip so the branch tapers naturally. A gray sweater makes the green look brighter.
Practice the stroke on a plastic lid or swatch stick first to get comfortable with the length.
23. Light Blue With Frosty Stars

Light blue with stars suggests a cold winter sky. White or silver stars both work, and tiny dots can stand in for stars.
Pastel blue suits easy Christmas nails for anyone who wants a cooler, icy palette.
A frosted pinecone in the styling echoes the pale tone. Seal the stars with a clear top coat so they do not lift.
24. Burgundy With a White Tree
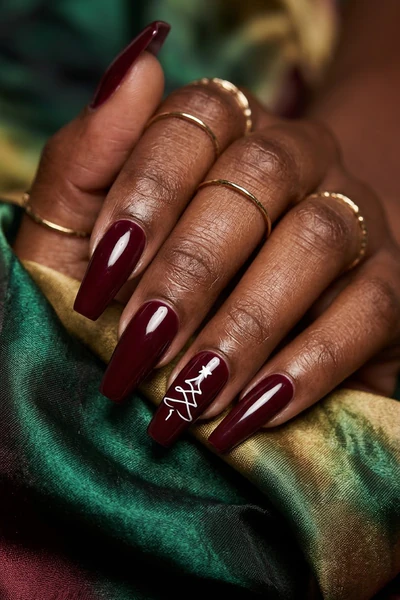
A Christmas tree on burgundy uses three stacked zigzag rows in white, narrowing toward the top. A dot of gold can sit on top as a star.
Trees are a recognizable shape, and easy Christmas nails with them can be done with just a thin brush.
The white-on-burgundy contrast has a nostalgic feel. For more throwback ideas, see 34 Retro Christmas Nails Bold Designs With a Nostalgic Holiday Twist.
25. Slanted Gold Tips

Gold tips on beige appear again here, but slanted instead of curved. Angle the line from one side of the nail to the other.
A slanted tip adds variety to easy Christmas nails and is simpler than drawing an exact curve.
Red velvet in the styling makes the gold look warm. Use gold polish or a fine foil for the line.
26. Micro Red Tips

A micro red tip is the thin cousin of the bold red French earlier. Paint a narrow line at the very edge with a fine brush.
Because the line is so small, easy Christmas nails like this look refined and use very little polish.
A red ornament in your styling matches the tip color. Clean the edge with a brush dipped in remover if the line wobbles.
27. Gold Flakes Near the Cuticle

Gold flakes on beige differ from the caramel version, since the lighter base lets the flakes read as sparkles instead of metallic spots.
Place them near the cuticle for easy Christmas nails that appear to glow from the base.
Cinnamon sticks in your styling match the warm tone. A top coat flattens the flakes so they do not catch on fabric.
28. Easy Christmas Nails With Green Stripes

Diagonal green stripes on white are made with tape or a thin brush. Place two or three stripes per nail.
Remove the tape while the polish is still slightly wet to avoid pulling up the color. Straight lines are easier with a ruler edge.
The stripes recall wrapping paper, and the white base keeps the green clearly visible.
29. Glossy Red With a White Star

A white star on glossy red is a clean, high-contrast design. Use a star sticker, or paint five short strokes out from a center point.
This is one of the easy Christmas nails that needs only two polish colors.
Keep the rest of the nails plain red. For more approachable ideas, see FASHION’s simple but cute Christmas and holiday nail art designs.
30. Holly Leaves and Berries

Holly leaves are pointed ovals with slightly wavy edges. Paint two in dark green and add three red dots as berries.
Holly is a familiar symbol, so easy Christmas nails with it read clearly even when the details are small.
Use beige as the base to keep attention on the green and red. Holding real holly leaves in photos adds a natural touch.
31. Dark Green With Gold Dots

Gold dots on dark green look like lights on a tree. Use a dotting tool and space them along a loose line or scatter them.
Dots are about as beginner-friendly as easy Christmas nails get, since the tool does most of the work.
Chunky knit gives a cozy backdrop. Let each dot dry before touching the nail so the dots stay raised and round.
Start With One Tool and One Shade
The ideas above reuse a short list of techniques: dots, tips, stars, lines, and a few decals. Once you can do one, most of the others follow with a different color.
Save the article, pick the look that matches your supplies, and test it on one nail before doing the full hand. Easy Christmas nails are simpler to adjust when you try the design small first.